A Senior’s Guide to Creating, Sharing and Gift Shopping with Amazon Lists
The holidays are here and the spirit of giving is upon us! Of course, with family and friends spread out across the country, you might find that deciding on the perfect present is a little difficult. But this is the 21st century, and there’s almost always an online tool. For gift-giving (and receiving!) help, an Amazon List is the perfect solution.
Amazon Lists let you organize all your holiday shopping in one place, can be accessed by you and anyone you share your list with, and ensure you’re getting your special someone exactly what they want. Plus, once you know the basics, you can use Amazon Lists for birthdays, weddings or any other gift-centric occasion! Here’s how to create, share and access the Amazon lists that will make your holiday season a little easier.
How to create an Amazon list
Step 1: Signing in to your Amazon account
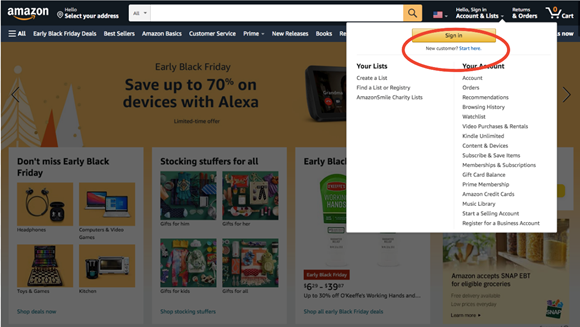
If you’re not already signed in:
- Go to www.amazon.com, and hover your mouse over “Accounts & Lists” in the upper right-hand corner to view the drop down menu.
- Sign in to your account by clicking “Sign In” and entering your username and password.
Step 2: Creating and naming your list
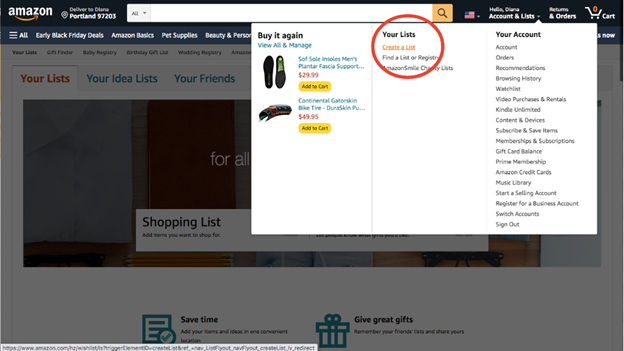
To create and name your list, go to the “Accounts & Lists” drop-down menu.
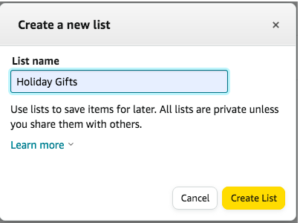
- Click on “Create a List.” A small window will pop up asking you to assign your list a name.
- After you’ve typed in the name you want, click the yellow “Create List” button.
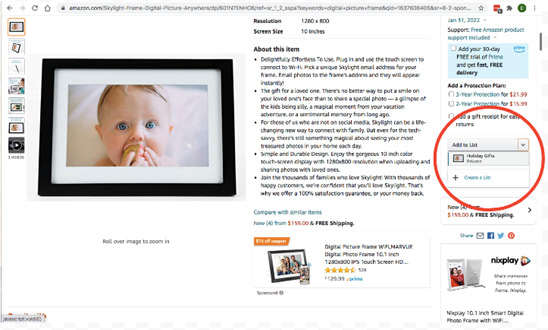
Step 3: Adding items
There are two ways to add items to your Amazon list. Both methods are quite simple and require just one click of a button.
Method #1: Search Amazon for products you’d like and add them to your list using the “Add to List” button on the right.
Method #2: Click “Add idea to list,” and type in the name of the item you’re looking for. Then click “Top search results” to see your options.
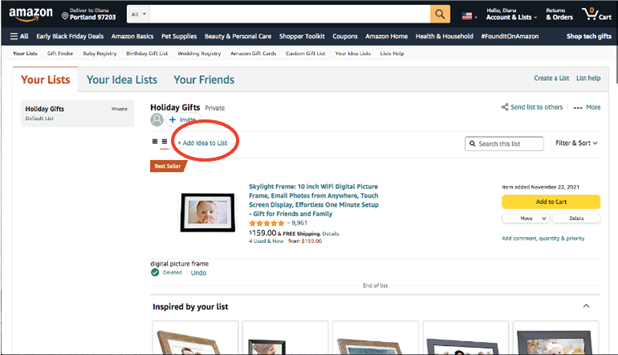
Using either method, when you’ve finished adding products, your new gift ideas will appear on your list immediately.
How to share an Amazon list
Step 1: Changing your preference to “Shared” under “Manage List”

To change your preference to “Shared” simply:

- Find the three dots on the right-hand side of the page.
- Hover your mouse over the three dots to reveal your options.
- Click on “Manage List,” to bring up a pop-up window.
- Change your privacy settings to “Shared.”
- Then click the yellow “Save Changes” button.
Step 2: Sharing your list
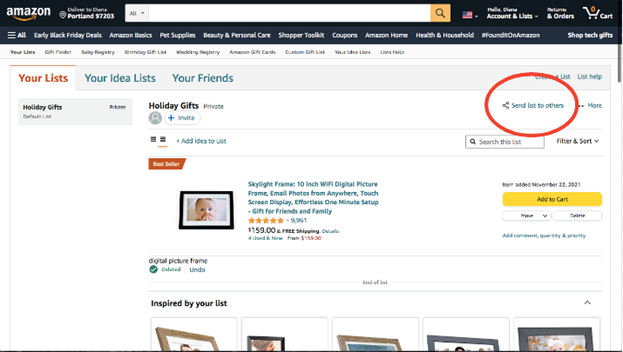
To share your list with anyone you’d like, go to the list and:
- Click on “Send list to others” in the upper right-hand corner.
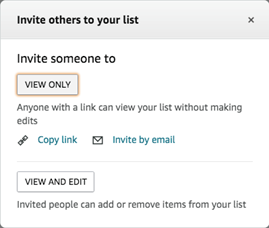
- When the pop-up window opens, decide if you want the person you’re sharing with to be able to “View Only” or to “View and Edit.” “View and Edit” can be especially helpful when you’re planning gift-giving with someone else.
- You have the option to either copy the link or send an invite by email.
Note: If you click “Invite by email,” the email program you usually use will open automatically.
If you’d like to copy and manually send the link:
- Click “Copy link.”
- Then open your email program, and open a new, blank email.
- Compose an email to the person you want to share with, and paste the link into the email yourself.
Note: Anyone you send the link to will be able to view (or view and edit) your wish list whenever they’d like.
How to access an Amazon list
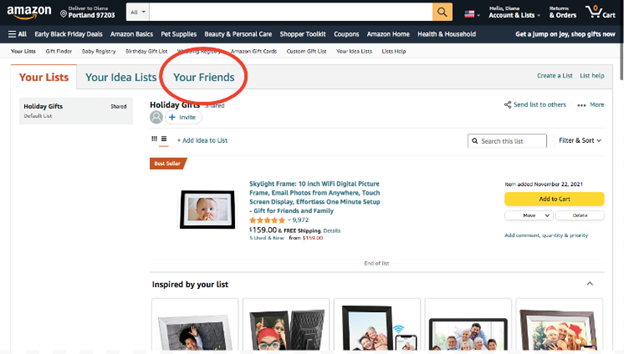
There are two ways to access someone else’s Amazon list.
- Click on the “Your Friends” tab to see anyone who’s shared their list with you.
- Send a request asking your friend to create and share their own list.
Otherwise, your friend can simply send you a link that will take you directly to their list. If they’re not sure how, forward this article to them to help them out!
Start Shopping!
Using Amazon Lists is as simple as that! With access to these gift ideas from your family and friends, you’ll have your holiday shopping done before you know it.
image credit: shutterstock/Monkey Business Images

- What Is a Medicare Advantage Plan? A Simple Guide - May 19, 2026
- Licensed Medicare Agent: Your Complete Guide - May 19, 2026
- Medigap Plan Comparison: A Guide from Plan A to N - May 19, 2026
More from MySeniorHealthPlan
- What Is a Medicare Advantage Plan? A Simple Guide - May 19, 2026
- Licensed Medicare Agent: Your Complete Guide - May 19, 2026
- Medigap Plan Comparison: A Guide from Plan A to N - May 19, 2026